This article provides step-by-step instructions on how to adjust the water pressure regulator valve in your home. Understanding how to properly adjust the water pressure in your plumbing system is essential for maintaining the integrity of your pipes and fixtures. By following these simple instructions, you can ensure that your water pressure is regulated and prevent any potential damage or leaks.
Cleaning and preparing the water pressure regulator valve
Before adjusting the water pressure regulator valve, it is essential to ensure that it is clean and free from any debris or sediment that may affect its performance. Start by turning off the water supply to the valve and relieving any pressure in the system.
Next, carefully remove the valve from its housing using a wrench or pliers. Inspect the valve for any visible signs of dirt or buildup. If necessary, use a brush or cloth to gently clean the valve, being careful not to damage any of its components.
Once the valve is clean, check the rubber diaphragm inside for any signs of wear or damage. If the diaphragm is in poor condition, it may need to be replaced. It is always a good idea to have a spare diaphragm on hand in case it needs to be replaced during the adjustment process.
After cleaning and inspecting the valve, ensure that all the parts are fitted back together securely before moving on to adjusting the water pressure regulator valve.
Locating the water pressure regulator valve
The water pressure regulator valve is typically located near the main water supply line in your home. It can be found in various locations depending on the layout of your plumbing system. Common places to look for the valve include near the water meter, near the main shut-off valve, or close to where the water line enters your home.
If you are unsure about the location of the valve, consult your plumbing system’s blueprint or contact a professional plumber for assistance. It is crucial to locate the valve accurately before attempting to adjust it to avoid tampering with other components of the plumbing system.
Understanding the different parts of the water pressure regulator valve
Before adjusting the water pressure regulator valve, it is essential to understand its different components and how they work together. The valve consists of a diaphragm, a spring, an adjustment screw, and a pressure gauge.
The diaphragm is a rubber disc that controls the flow of water through the valve. It is connected to the spring, which provides resistance against the incoming water pressure. The adjustment screw allows you to increase or decrease the tension on the spring, thereby adjusting the water pressure.
The pressure gauge is a useful tool for monitoring and measuring the water pressure. It is typically attached to the valve and provides real-time readings.
Having a clear understanding of these parts will help you make precise adjustments to the water pressure regulator valve.
Tools and materials needed for adjusting the water pressure regulator valve
To adjust the water pressure regulator valve, you will need the following tools and materials:
- Adjustable wrench or pliers: Used to remove and reinstall the valve.
- Brush or cloth: Used for cleaning the valve and removing any debris.
- Spare diaphragm: In case the existing diaphragm needs replacement during the adjustment process.
- Pressure gauge: Helps monitor the water pressure accurately.
- Teflon tape: Used for sealing any connections or fittings during reassembly.
It is crucial to have all the necessary tools and materials readily available before starting the adjustment process to ensure a smooth and efficient experience.
Turning off the water supply
Before adjusting the water pressure regulator valve, it is essential to turn off the water supply to prevent any potential leaks or accidents. Locate the main shut-off valve, typically located near the water meter or where the water line enters your home.
Use caution when turning off the main shut-off valve, as it may require some force to close fully. Once the water supply is turned off, open a faucet or two in your home to relieve any remaining pressure in the system.
Confirm that there is no water flow by checking the faucets. Once the water flow has stopped completely, you can proceed with releasing the pressure from the system.
Releasing pressure from the system
To release the pressure from the system, locate the pressure relief valve or a drain valve positioned downstream from the water pressure regulator valve. Carefully open the valve to allow any remaining water to drain out.
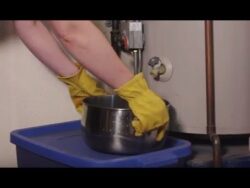
Ensure that you have a bucket or container to collect the water as it drains out. Remember that the water may be under pressure and can be hot, so exercise caution while handling the draining process to prevent any injuries.
Allow all the water to drain completely before proceeding with adjusting the water pressure regulator valve.
Adjusting the water pressure regulator valve
With the water supply turned off and the pressure released from the system, you can now proceed with adjusting the water pressure regulator valve. Start by carefully removing the valve from its housing using a wrench or pliers.
Locate the adjustment screw on the valve, typically positioned on top or at the side. Turn the adjustment screw clockwise to increase the water pressure and counterclockwise to decrease the pressure.
Make small adjustments at a time and keep track of the changes in water pressure using the pressure gauge. Ideally, adjust the pressure to a level recommended by your local water authority or within a range that suits your household needs.
Once you have achieved the desired pressure, securely reassemble the valve and tighten any fittings or connections using an adjustable wrench or pliers. Apply Teflon tape to ensure a tight and leak-free seal.
Checking the water pressure after adjustment
After adjusting the water pressure regulator valve, it is essential to check the water pressure to ensure that it is within the desired range. Turn on the main shut-off valve, allowing the water to flow back into the system.
Open a faucet and use the pressure gauge to measure the water pressure. If the pressure is too high or too low, make further adjustments to the water pressure regulator valve as necessary.
Remember to monitor the water pressure closely during this step, as small adjustments may be required to achieve the desired pressure level.
Monitoring the water pressure over time
Once you have adjusted the water pressure regulator valve, it is recommended to monitor the water pressure over time to ensure its stability. Fluctuating water pressure can lead to issues with plumbing fixtures, appliances, and potentially cause damage to the plumbing system.
Regularly check the water pressure using a pressure gauge and compare the readings to the desired pressure range. If you notice any significant changes or inconsistencies, consider adjusting the water pressure regulator valve accordingly or contacting a professional plumber for further assistance.
Safety precautions and final steps
When adjusting the water pressure regulator valve, it is crucial to follow certain safety precautions to prevent accidents or damage to the plumbing system. Always turn off the water supply and release pressure from the system before attempting any adjustments.
Exercise caution when handling hot water or when draining the system, as hot water can cause burns. Additionally, ensure that all fittings and connections are tightly secured to prevent any leaks.
Finally, make sure to keep a record of the initial water pressure and any adjustments made for future reference. This will be helpful for troubleshooting or fine-tuning the water pressure regulator valve in the future.
By following these steps and safety precautions, you can successfully adjust the water pressure regulator valve at home and maintain optimal water pressure throughout your plumbing system.


